
 1847
1847
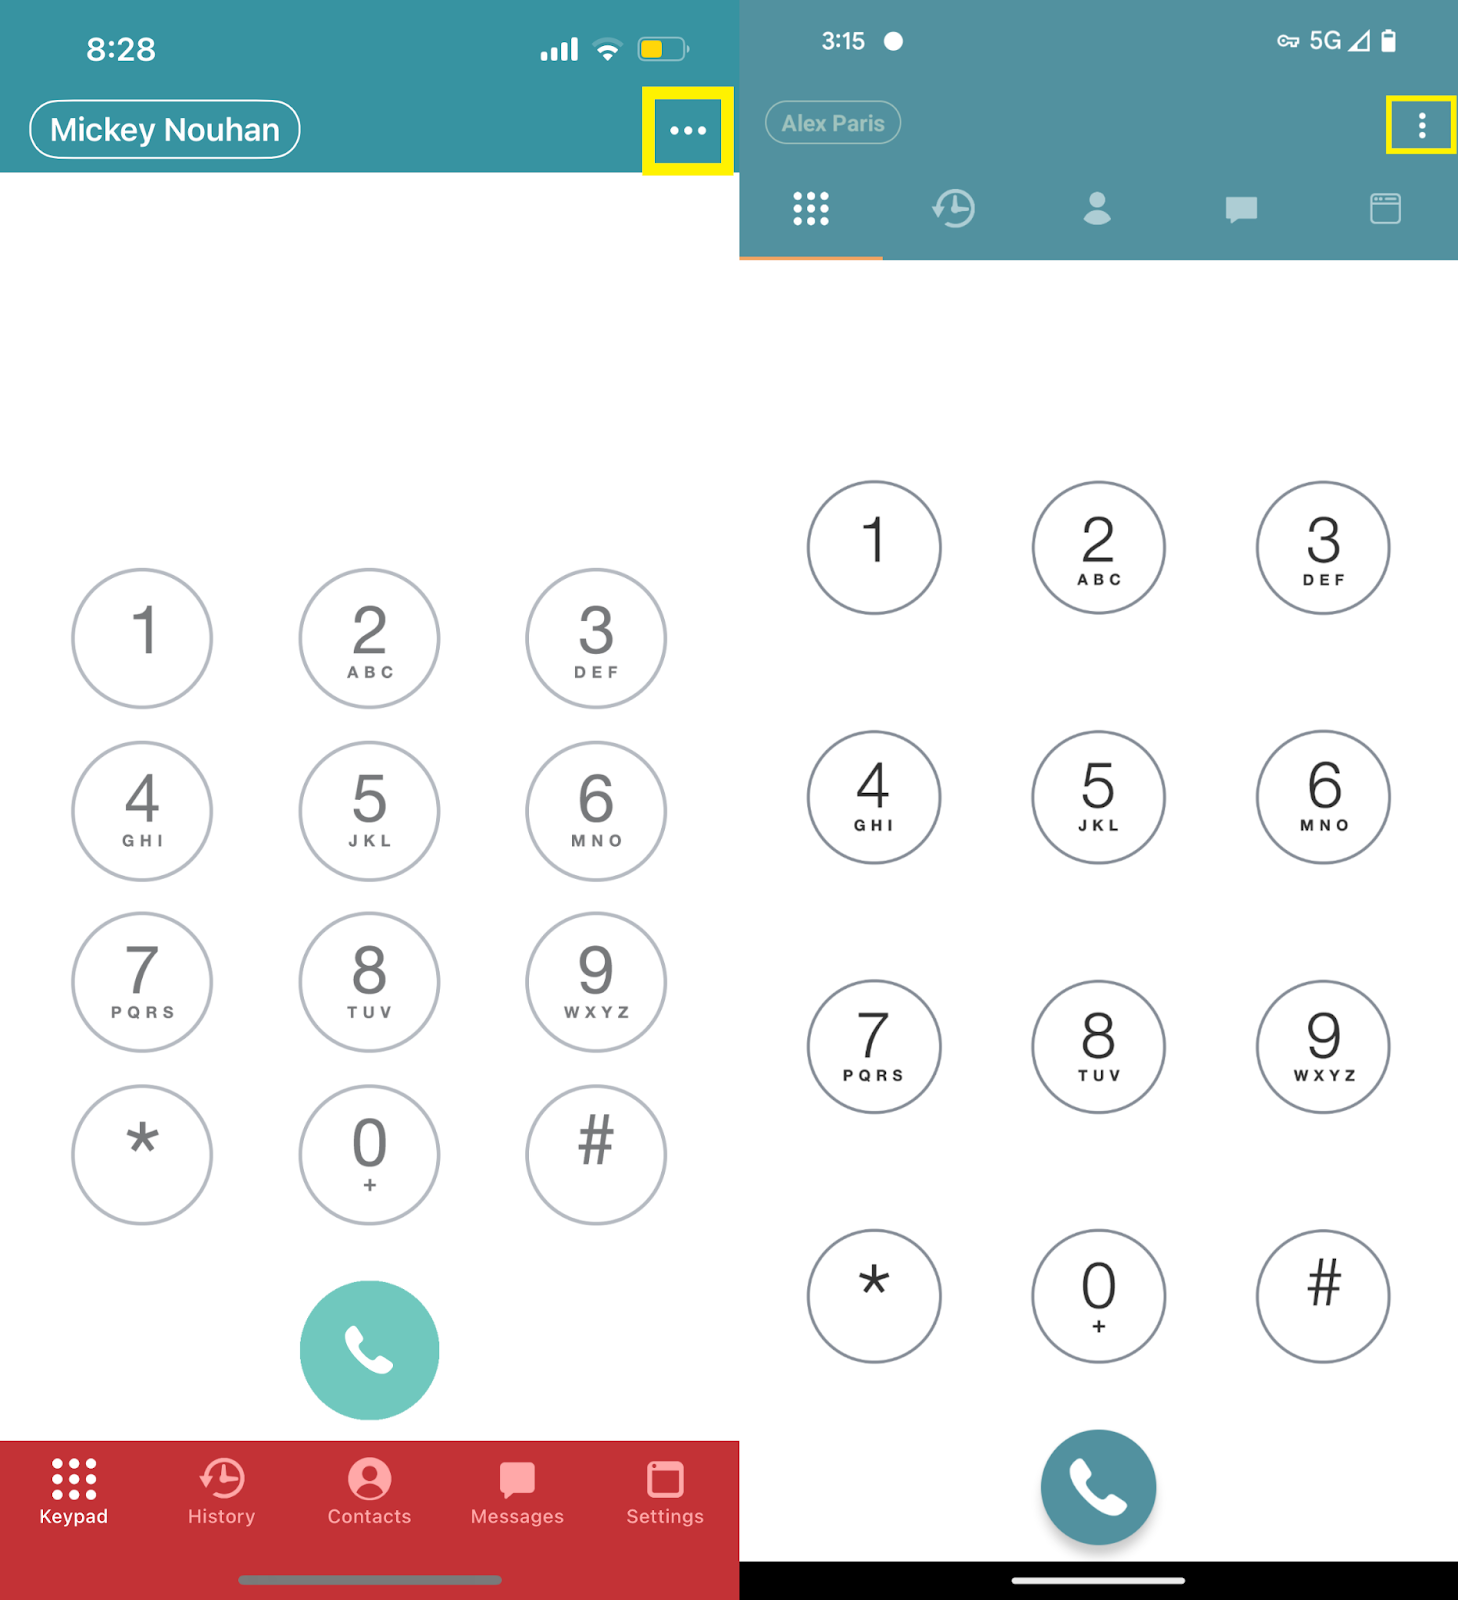
Enable SIP Logs
iOS (left side): Click the 3 dots in the corner
Android (right side): Click the 3 dots in the corner and tap "Settings"
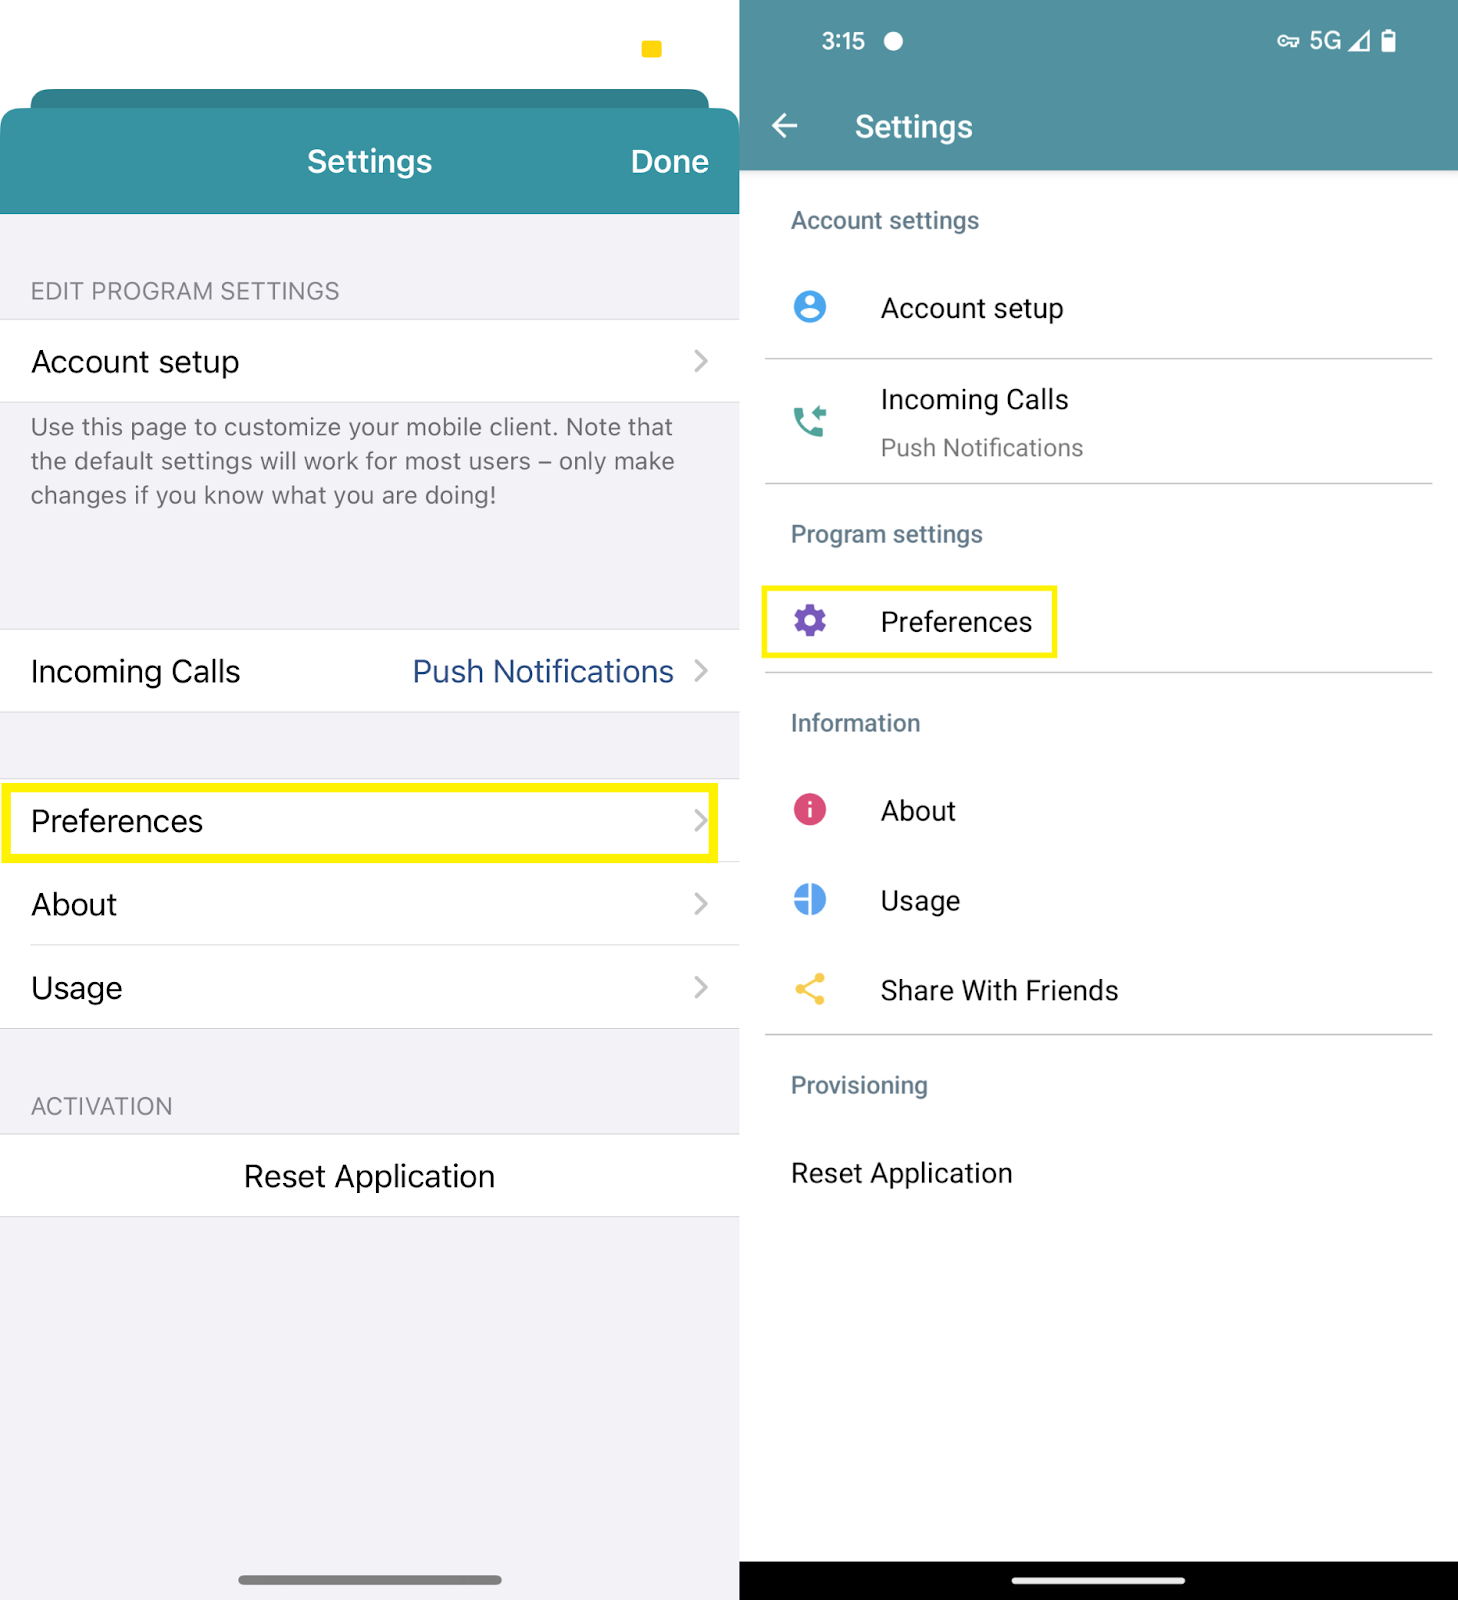
iOS (left side): Select Preferences
Android (right side): Select Preferences
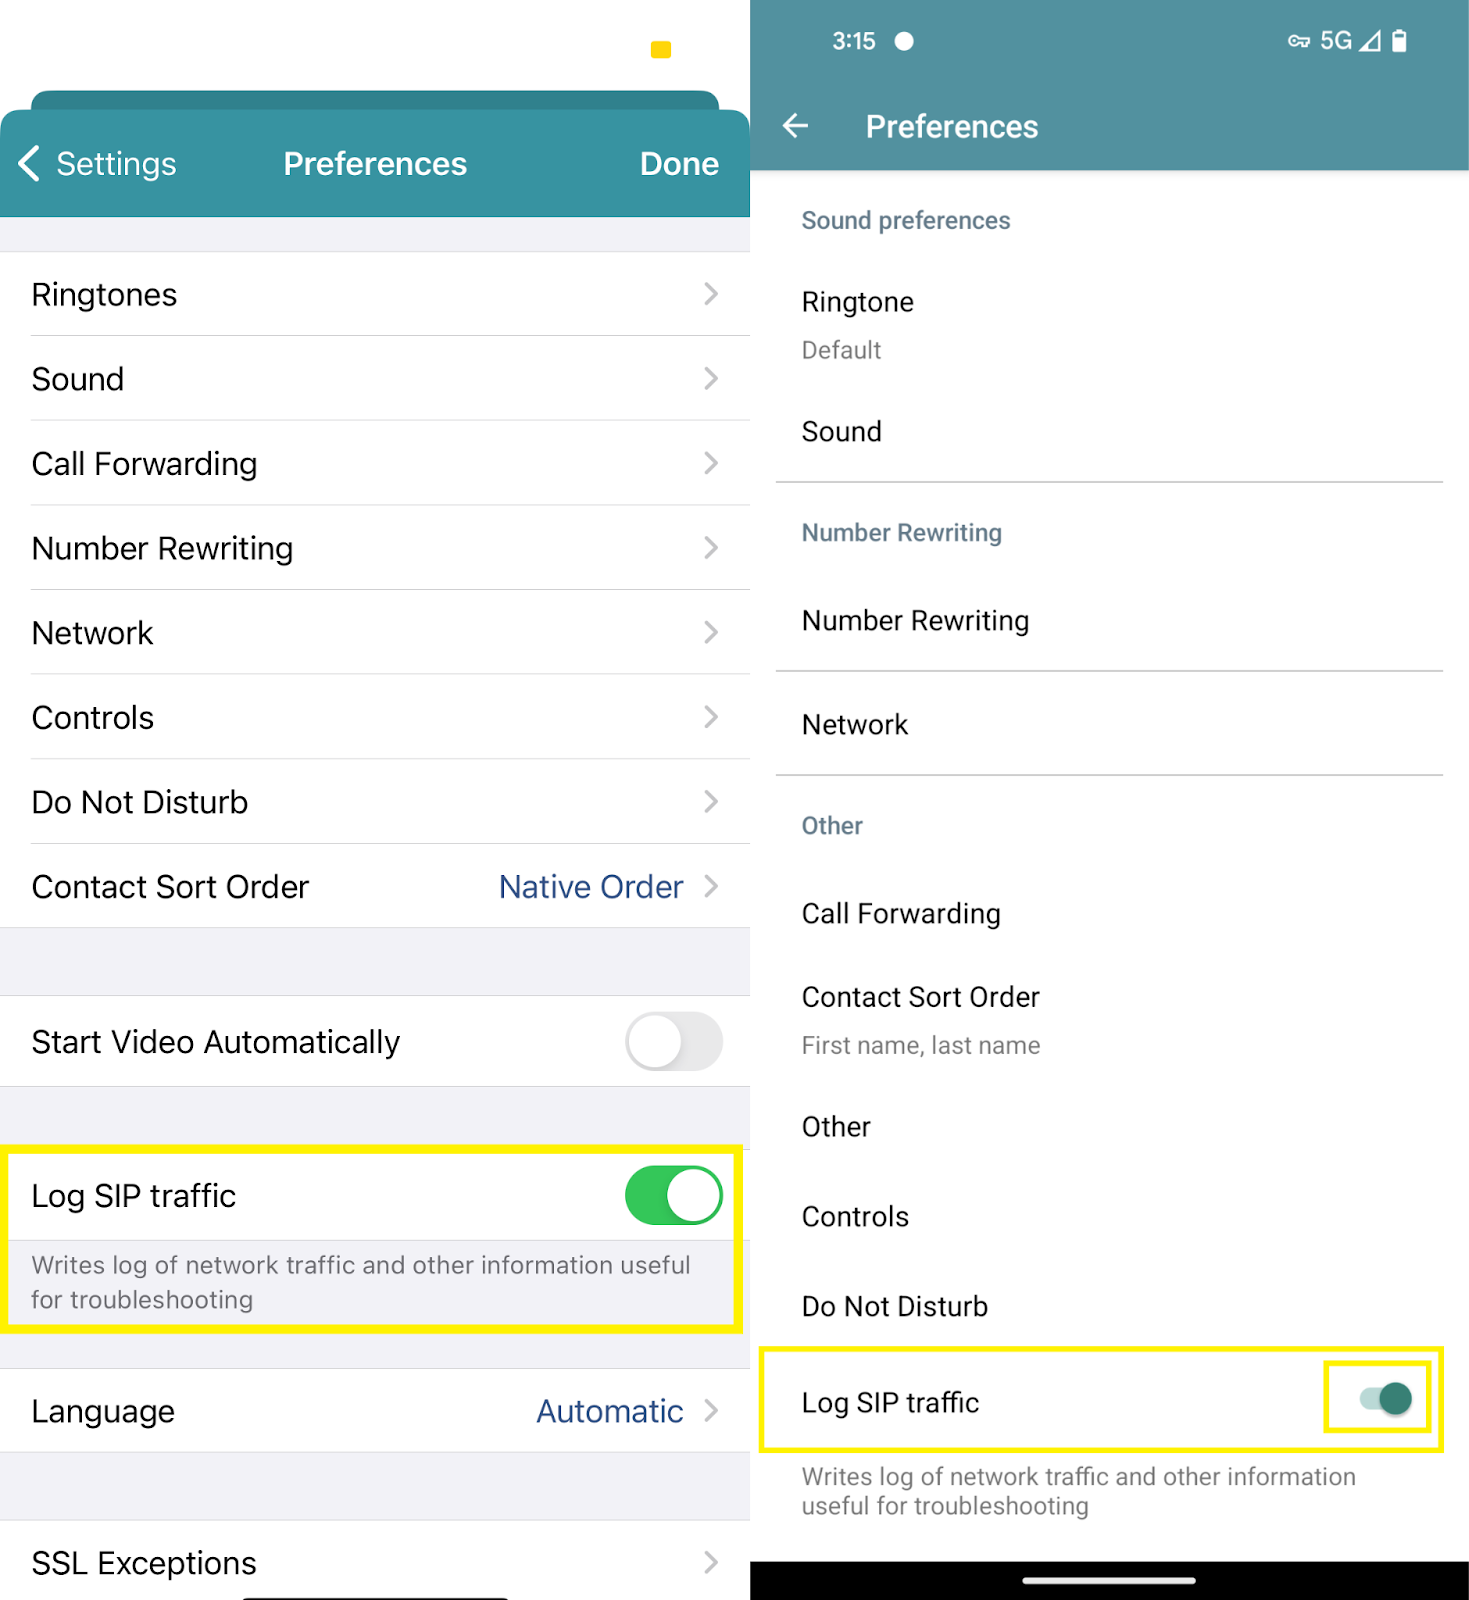
iOS (left side): Turn On "Log SIP traffic"
Android (right side): Turn On "Log SIP traffic"
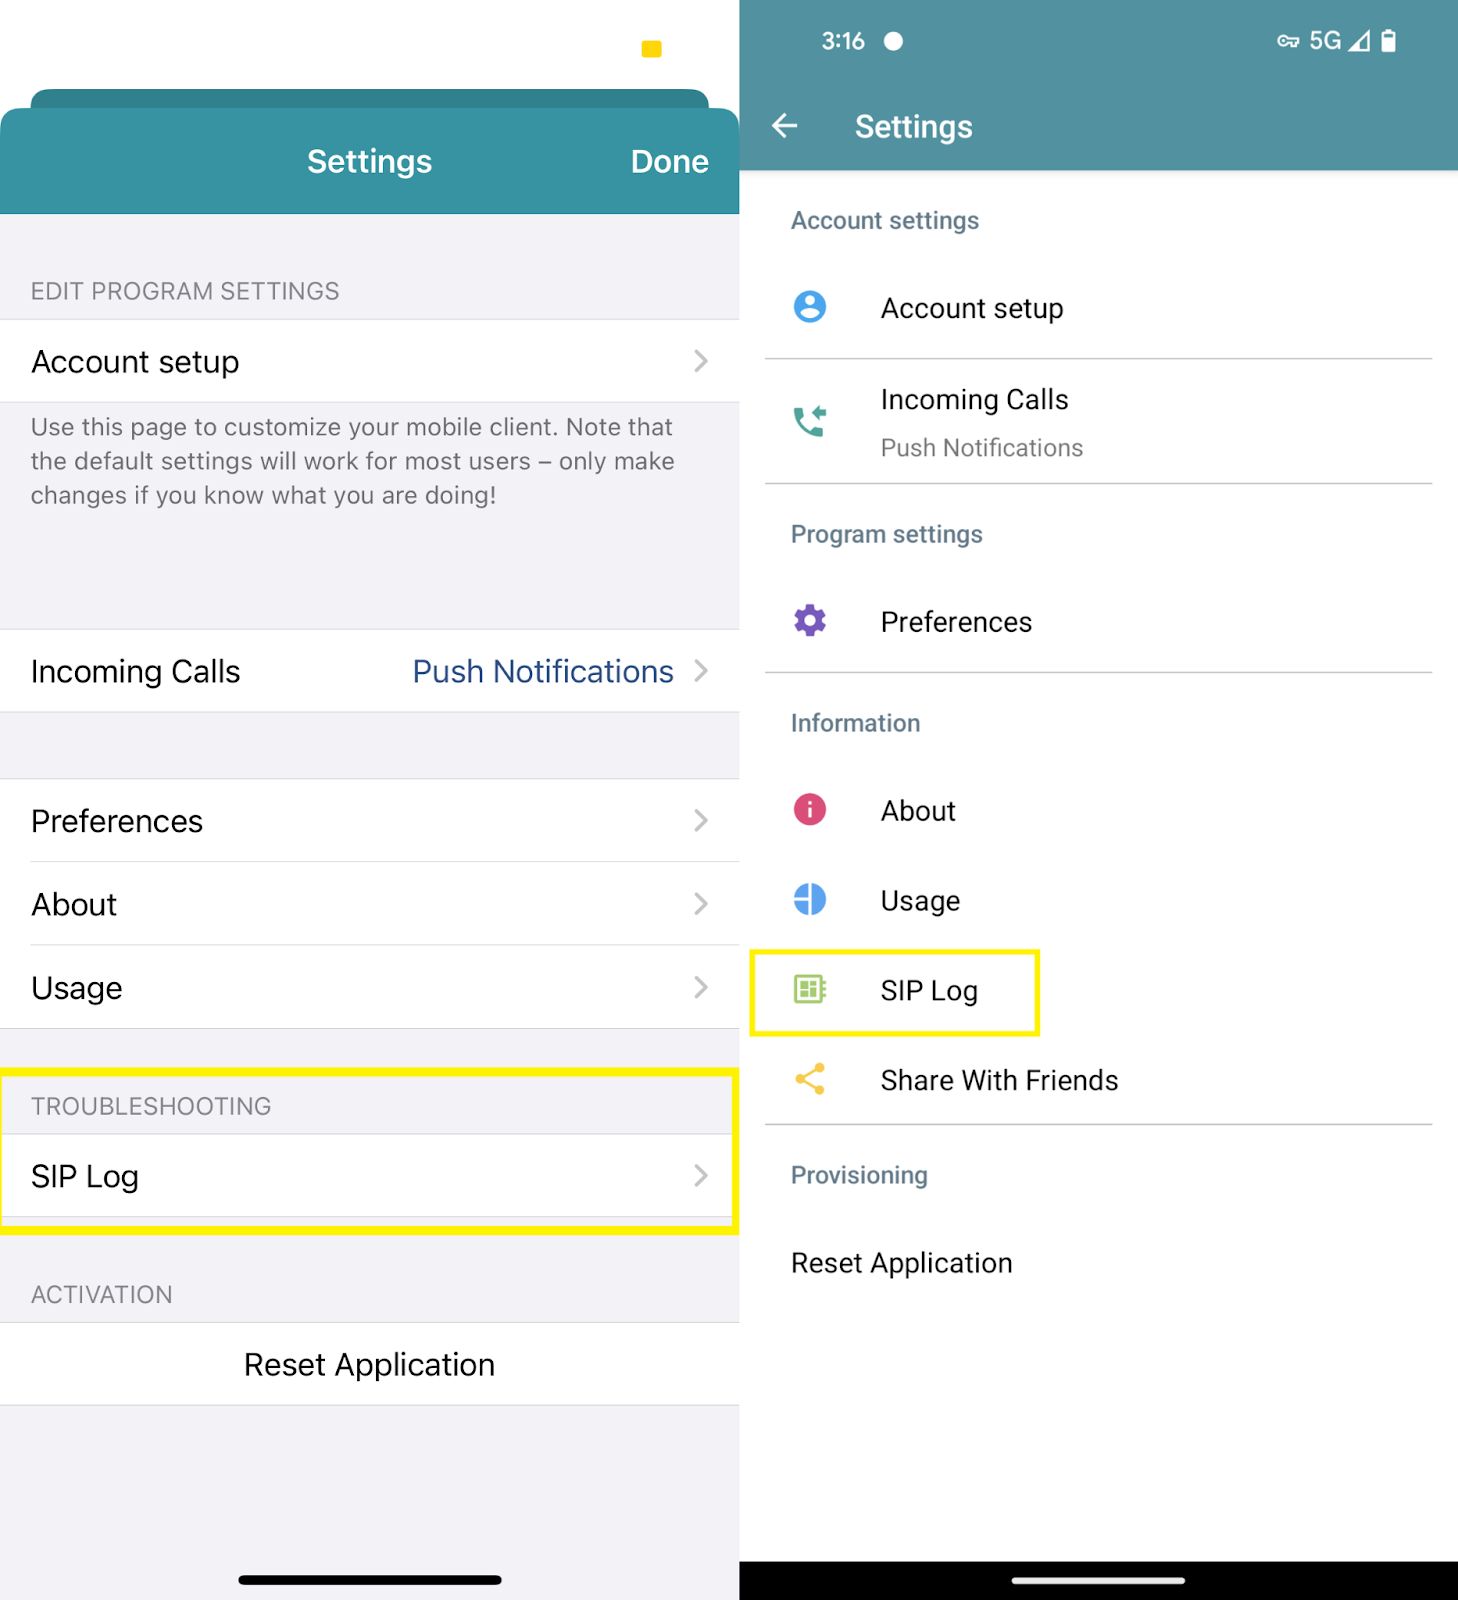
iOS (left side): Click Done, and there will be a new section in the settings:
Android (right side): Click the back arrow, and there will be a new section in the settings:

Send SIP Logs
iOS (left side): Click the 3 dots in the corner
Android (right side): Click the 3 dots in the corner

iOS (left side): Select SIP Log
Android (right side): Select SIP Log
iOS (left side): This will open the SIP Log screen, select "Share"
Android (right side): This will open the SIP Log screen, click the 3 dots in the upper-right corner and select "Share"

iOS (left side): Select 'Other' in the new popup window
Android (right side): Select your mail app, or drag up on the tray that appears in the bottom and then scroll to find your mail app

iOS (left side): Select Mail or another email app
Android (right side): Select Mail or another email app

iOS (left side): Enter [email protected] as the email to send to and include your company name and extension number in the body of the email
Android (right side): Enter [email protected] as the email to send to and include your company name and extension number in the body of the email

iOS (left side): Send the email
Android (right side): Send the email


